Table of Contents
So, you want to learn how to make a silk screen stencil? Whether you’re planning to print custom t-shirts, create funky tote bags, or just want to explore a new creative hobby, you’re in for a rewarding (and inky) ride. Silk screen printing is one of those artsy techniques that looks complicated from the outside, but once you break it down, it’s surprisingly doable—even for total beginners.
In this guide, we’ll walk you through every step of making your own silk screen stencil from scratch. No fancy machines needed—just a few materials, some patience, and a splash of creativity.
What is a Silk Screen Stencil?
Let’s clear up the basics. A silk screen stencil is a design or image that’s been prepared to block certain parts of a screen. When ink is pushed through the screen, it passes through the open areas and leaves a print of your design on the surface below—like a shirt, poster, or fabric.
Think of it like a super-detailed stamp, only way cooler and more customizable.
Supplies You’ll Need
Before we dive into how to make a silk screen stencil, gather these supplies. Most of them are inexpensive and easy to find at your local art store or online.
Essential Materials
- A screen printing frame (with mesh attached—can be actual silk or polyester mesh)
- Stencil material (paper, vinyl, or photo emulsion method—more on that in a bit)
- Squeegee
- Screen printing ink
- Design printout (black and white is best)
- Transparency film (if using photo emulsion)
- Craft knife or cutting machine
- Tape (painter’s tape or masking tape)
- Cardboard or a flat surface (to go under your material)
- Access to a dark room or low-light space (if using photo emulsion)
Step-by-Step Guide
Step 1: Choose Your Design
Keep it simple to start—bold lines, not too many details. If it’s your first time, avoid gradients or teeny-tiny fonts. Print your design in solid black on regular paper or transparency film.
Step 2: Prep Your Screen
Take your screen printing frame and make sure it’s clean and dry. If you’re using it second-hand, give it a gentle scrub with soap and water to remove old ink or emulsion.
Pro Tip: Higher mesh count = more detail. Lower mesh count = more ink coverage. For beginners, 110–160 mesh count works great.
Step 3: Choose Your Stencil Method
There are a few ways to make a silk screen stencil, depending on your budget and vibe:
Option A: Paper or Vinyl Cutout (Easy)
- Print your design on paper or cut it out of adhesive vinyl.
- Use a craft knife or cutting machine (like Cricut) to remove the parts of the design where you want ink to go.
- Tape the stencil to the underside of the screen.
- Tape off the edges around the stencil to avoid ink leaking through unwanted areas.
Best for: Bold, simple designs and one-time projects.
Option B: Photo Emulsion Method (Advanced but Pro-Level)
- Coat your screen with photo emulsion (in a dark space).
- Let it dry in a pitch-black or low-light room.
- Place your transparency with the design on top of the dried emulsion.
- Expose the screen to bright light for the recommended time (usually a 250-watt bulb or sunlight for a few minutes).
- Wash the screen with cold water—the emulsion where your design was will rinse away, creating the stencil!
Best for: Detailed, reusable designs and multiple prints.
Step 4: Set Up Your Printing Station
Lay your shirt or paper flat on a table. Slide a piece of cardboard or another barrier inside the shirt (so ink doesn’t bleed through).
Place your screen stencil down with the design aligned properly. Tape the frame edges if needed to prevent movement.
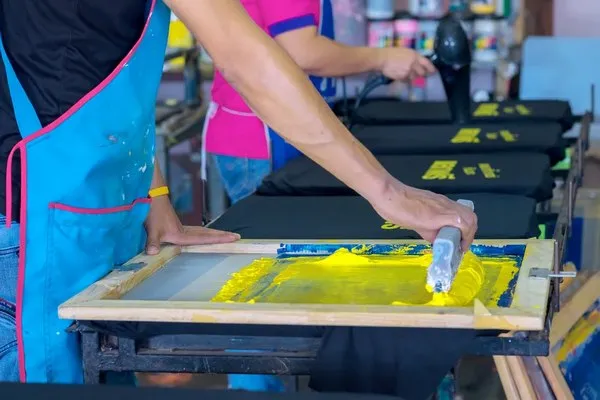
Step 5: Ink & Squeegee Time
- Scoop a line of ink across the top of the screen.
- Using your squeegee at a 45° angle, pull the ink across the design firmly.
- Do a few passes to ensure full coverage.
- Lift the screen carefully—and boom! Your design should be beautifully transferred.
Step 6: Dry & Clean
Let your printed item dry for 24 hours, or use a heat gun or dryer to speed things up.
Don’t forget to wash your screen ASAP so the stencil doesn’t clog or dry up. If using photo emulsion, you can reclaim the screen with emulsion remover for future projects.
Tips for First-Timers
- Test print first: Always do a practice run on scrap fabric or paper.
- Less is more: Start with minimal ink and increase if needed.
- Stay clean: Wear gloves and an apron—this gets messy fast.
- Stencil warping? Secure edges tightly with tape to keep it from shifting.
FAQs
Q: Can I reuse a silk screen stencil?
Yes! Especially with photo emulsion stencils—they’re durable for multiple prints. Paper or vinyl stencils usually last just a few rounds.
Q: What kind of ink should I use?
Use screen printing ink, not regular paint. It’s specially formulated to flow through mesh and bond with fabric or paper.
Q: Can I use a regular printer to make my design?
Absolutely. Just print in high-contrast black and white. If using the photo emulsion method, print on transparency film using a laser or inkjet printer.
Q: Do I need a lightbox for the photo emulsion method?
Not necessarily. Sunlight or a strong lamp can work. A lightbox or exposure unit gives more consistent results, though.
Q: Is silk screen printing the same as screen printing?
Yep! “Silk screen” is the old-school term from when actual silk was used. Today, most screens are polyester—but the process is still called silk screening.